Good Afternoon,
Oh I am so upset I missed my morning. But I am on it now and posting my tutorial of the Origami Bow. Lots and lots of photos to show you step by step.
I know the colours are not great but this is all the designer printed paper I have at the moment (buying more today!!). Cut 4 pieces of 1/2" x 12" printed paper
Fold all four pieces in half
Cut the ends on a slant (as shown above).
Place all four pieces through each other, do not separate the pieces. This bottom piece, should be in the middle together - not separated.
Pull pieces up, over, down and across slowly together to get this tight square (on all four sides there are two pieces) just trying to stress the importance of keeping the pieces together.
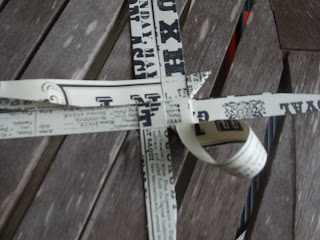
Starting at the bottom, bring one piece of paper up. The right side, over. The top, down. The left side is the only one that is different. When you bring it across, you need to loop it under the square on the left. (I haven't done that with this top photo yet, that is why the piece of paper is sitting up.
Sorry, just showing you another photo of the piece now tucked through the left.
I am going to show you a few photos of this little complicated bit. It is easier to show this part then explain it.
This is the four sides finished. Now we cut off the excess dsp (just the top bits)
This is it with all four excess dsp cut off
Turn over the bow and now we do the same thing on this side. Turn the piece of dsp under and flip over to push into tab (did you like that!!!!! make heaps of sense - don't worry I have a heap more photos)
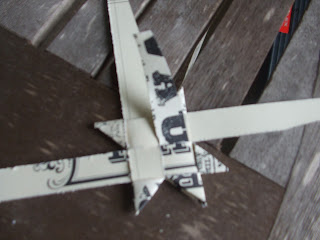
Ohhhhhhh, I haven't shown this one but you can refer back up to the top photos, as we are doing the exact same thing to get the points, at the end.
This is all the four sides finished. Now we are going to do the little bow on the very top.
Sorry, it is a bit blurry (our days have been really overcast and I have been having trouble getting good photos).
This is two of the sides done. You need to flip the dsp around and under the tab beside it and it pulls through the bottom triangle. This photo is showing the dsp (at the bottom) coming through the triangle. This is why you needed to cut the angle on the pieces of dsp in the beginning.
All four ends are sticking out of the triangles. And to finish off the bow, we simply cut off the ends.
And one I did at Christmas time. I did take the photo at the same time which is why it is blurry (sorry, I promise I am buying a new camera)
I hope that my instructions were easy to understand, but the more you make the easier they are. Truly, they are so much fun to make. I try and make one every week or so, so I don't forget how to make them.
Have a lovely afternoon...


No comments:
Post a Comment