Showing posts with label album. Show all posts

Wednesday, September 5, 2012

Easy Brag Album

Evening everyone,
I am very frustrated as I have been searching u-tube to find the album, I am going to show you tonight but I didn't add it to my favourites and unfortunately I didn't write down the name!!!  I get so mad at myself and can't believe I keep doing it.  I use to print out a lot of information but now I make the basic while I am on the net and finish it off later, hence my inability to remember to write down information!!
I found it on u-tube, so I will continue to look but if you see something similar can you please let me know and I will be able to put it on this post, where I first saw it.
Guess what?  I just found her, you will love her tutorial, I am so happy.  Here is the link to Stephanie Miller, My prima place.  Now I can go to bed happy.  Thank you for putting up with me, lol.
So on to my boy album....
 The front using lots of the stickers from Simply Scrappin' Country Club which I bought a couple of months ago and only now got around to using.
 Sorry the photo is a little fuzzy but I promised to post tonight and I don't have time to take some extra pictures.  I have put lots of places for extra writing and pictures.
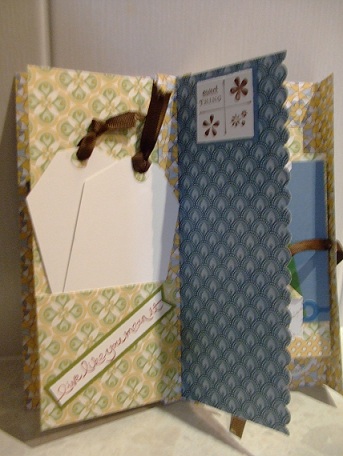
 This is the same page with the flap open.
 A couple of tags with decoration on the bottom, forgot to take those ones out!
 I have finally got to use the Sweets for the Sweet stamp set and will get it out more often over the next couple of months.  More tags in a pocket.

 Another page and another insert to add extra photos/journalling
I have never been big on printed paper on printed paper but I am starting to like the concept, little by little.
So now some quick instructions for you.  (I plan on making lots more but there are a couple of stamp sets in the new catty that I will need first).
7 1/2" x 12" dsp and score at 31/2", 4", 41/2", 5, 51/2", 6", 61/2", 7", 71/2" and 11", 111/8" and 11 1/4"  -  accordion fold leaving the 31/2" as your front.
Tape the accordion folds together from the back.
Make some pages to go in the accordion folds leaving a slight border, I made mine 31/4" x 71/4" with one much smaller (the back one in this book).
Decorate as much as you would like.
I will make a tutorial as soon as I can track down the person I copied this from, she was amazing.
Thanks for stopping by and have a good night..... That's right, I have found her, so if you would still like me to make a tutorial, just let me know..

Tuesday, September 4, 2012

Scallop Envelope Mini Album

Hi everyone,
Well I have finally finished the album but I can't show you tonight as I have taken the photos but need to re-charge my batteries.  I tell you that was some hard work!  It has been a long time since I have made and decorate a mini album and my mind went into overdrive.  And it was for a boy, funny how you keep looking at all the flower punches and die cuts!!!!
So tonight I have a different type of album to show you (yes, I am on an album roll at the moment) and this one is using the scallop envelope die.  I have found quite a few on different blogs and if you would like me to do a tutorial, just let me know.
 I am making this one into a Christmas album (as you can no doubt tell!) to give to a family member.  All the tags pull out and can be used for journalling or photo's.  I have used one of my favourite retired dsp's.
 Oh, the sale-a-bration dsp also went well with the Christmas theme, got to love that!
So I finally got to make a journal and there are plenty of sites to case from, so give it a go, or if you are like me, you have so many projects you want to make that it all gets put on the back burner!!  So drop around tomorrow for the accordion fold mini.
Have a lovely evening.........

Friday, June 22, 2012

Swap With Angie

Hello,
I am finally back, yet again and tonight I have my swap with Angie to show you.  So to recap, we had to make something to fit into these plastic cases (that we both loved) and Angie is a pretty special person so I wanted it to be special for her and that took me ages to think about what she would like.  I know she loves purple so that wasn't hard and then I saw this album on a blog (which I promise to give next time, as you probably have guessed..... it is on my table somewhere!!). Found it, stampin inspriations. I really want to make another so I will give you all the details then.  So on to my swap......
 So these are the cute zipper cases and I put in two bookmarks and an album
 This is the tag on the outside of the case and I used the newspaper print (which I love and don't use enough of)
 One bookmark - folded over with a magnet holding it together
 Sorry this photo is blurry but it has the newspaper print down the middle - just to be different to the other
 On to the album with these cute little flowers I found in a magazine.  Cut a 1" strip of dsp and cut down three quarters strips, place glue on uncut side and start to roll tightly and flatten.  That is the quick easy version
 Another semi-blurry photo where photos can be added or journal

And another picture of the finished product.  If you would like instructions just let me know but I will try and get a tutorial done up this week as I would like one for myself in a different colour, ummmm I'll surprise you with the colour.
Have a lovely weekend and I promise to post every day next week.......

Friday, January 6, 2012

Photo/Tag Mini Album

Evening all,
Nice summery night tonight and I am feeling it, all good!  SO I have been busy making some Valentine goodies but I still have a mini scrapbook/Tag book to show you....


So you can put pictures or just write some notes on the tags and on the pages.  Not sure about my choice of belly band picture but I couldn't think of what else to use, so I could change that yet!
This is going to come as no surprise to you but I can't find my instructions - I will be tidying up tonight but if you would like instructions just e-mail me.
Stamp set:  Faith in Nature
Card:  Retired card, early espresso, whisper white and paisley petals and river rock
Ink:   Baja breeze and old olive
Acc:  Brads and whisper white ribbon
Tools:  Round tab punch, crop-a-dial, 3/4" circle punch and eyelet scallop border punch
thanks for stopping by.......

Saturday, July 23, 2011

My First Un-Cased Album

Helloooooooo,
  Yes I am still here.  So sorry, it has been such a busy week and I haven't managed to post.  I have been missing my blogging so much and need a craft fix badly.  Might have to try and put some time aside tomorrow to craft.
  My parents have been married 50yrs on the 11th, November, 2011 at 11am.  How amazing is that!! So we are having a big family get together that one of my brothers is organising, which is so sweet.  And of course, being a crafty person, my brother asked me if I would organise something to hold a message from us all.  Of course I would love to......  So this is what I have come up with, quite proud of myself.
This is the cover of my book, my Mum loves pink and my Dad goes along with whatever my Mum likes.
I love this stamp set and finally got it, love it, love it, love it.  Great stamps for scrapbooking and I know I need to get back into that.
My spine.  I decided to use brads with some dsp on the inside hiding the pins.  Tossed up lots of ideas but I love brads.
The back, but this could change.  I still need to get notes and photo's so who knows what could end up happening here!
My first page, I will be using the chocolate as well to put a note in and then a picture or saying on the pink depending on what I get from my siblings.
Thought I would just show you the double pink page as well, this will change also depending on what I get.  All the pages have one side that has a pocket so the notes can go inside.
 A picture just showing you the heart punch that I am so glad I got, have used it quite a bit lately.
Still the same colour, just the camera on a different angle.  Just showing you my first bit of sewing in absolute ages.  I sewed all the tops of the pockets down, I was thinking it would be a nice touch!
This is the inside spine, thought I would show you, even though I could have done a little better.
   So that is my very first uncased album.  I wish I could show you what it would look like after pictures and notes but I think this is going to be a crammed job at the last minute!
Stamp set:  Word Play
Card:  Chocolate chip, pretty in pink and dsp - subtles
Ink:  Chocolate chip and pretty in pink
Acc:  Brads, flower brads, embroidery thread, chocolate chip ribbon and pretty in pink ribbon
Tools:  Paper piercer and mat, crop-a-dial, heart border punch
Have a lovely evening.........

Monday, July 4, 2011

Card That is Like a Mini Album

Hi Again,
  I promised my second card that is similar to a mini album and here it is.  So glad JAI had this challenge, it really inspired me to make these fancy cards.  I still have the circle one to make because it is not as hard as it looks to make!  You need to pop over there and have a look, or maybe Pratrice is just too good!!
love this paper, have had it sitting there for awhile, too scared to use it!!!


So one for a male and one for a female.  I also have another joy fold to show you tomorrow, no pictures just words.....
Stamp set:  Sense of time,  I use a quote and then cut it in three and put it on the different pages as I couldn't think of what I wanted to put on the pages.
Card:  Rich Razzelberry, certainly celery, chocolate chip and dsp - greenhouse gala and play date.
Ink:  Chocolate chip
Acc:  Ribbon
Tools:  Paper piercer and mat, 11/4" punch
thanks for popping by.......

Monday, May 16, 2011

Criss Cross Photo Album

Hello,   I wanted to do a posting tomorrow morning but it is going to be pretty hectic here so I thought I would put it on this evening.  So here is a gorgeous criss cross photo album/wallet.
The front of the book with a belly band.

Inside the book with room for photos or journalling.

The outside of the book where you can also have photos or journalling.


Could also put more in here.  I am going to be making another one and will fill it up more, to show you.
  I will give you some instructions but if you would like me to do a tutorial with lots of pictures, let me know, as I intend to make quite a few of these.  Even for a couple of photos and writing on the other inserts would be a lovely present to give someone.  Sorry I am on the monochrome look at the moment but I was using some of my new dsp, promise the next one will have more colour.
dsp 12" x 12"  score     3", 6", 9" and 11 1/2"......... turn to opposite side and score again 11 1/2"
                       score     3 1/2" and 8 1/2"
Fold in the two 1/2".  Make four triangles on the edges by bringing the point over to the score line, it will not be the full size of the square (like I say, want a tutorial, happy to oblige)
Fold in the two outside flaps,  flattening the fold lines well.
This is the tricky bit - fold in the two ends at the 3" and 6" score lines, inserting each end into the opposite fold.  Flatten out with your hands, if there are crease marks inside, don't worry too much as you won't see them when you put in the photos or journalling.
Now time to decorate.
Truly this is so easy when you have made one
Have a lovely night/day....

Monday, April 4, 2011

Mini Album Purse

Good afternoon,
  As I said earlier, I have made quite a few purses, that I want to show you.  This is one of my favourites.  I made a really great friend when I asked for direction to make this gorgeous purse.  Bev, Stampin' All Day With Bev (her contact is on the side bar) sent me the directions and they are so easy and it is such a cute gift to give.  All about giving the gift!!
Now, wait until you see the inside:


Oh, you have to make one.  I wish I had pictures in here for you to help you truly understand how gorgeous this is.  But personally, I'm in love with this mini purse album.
I'll just give you some quick instructions and if you need more, you know where to find me..
1 pce 12" x 12"  scored at 4" and 8", turn dsp and score again at 4" and 8"
The four corner squares are scored from the inside corner to the outside corner.
Measure 6" down on both sides of the 12" x 12" and make a pencil mark, on both sides (will be the middle of the middle/outside squares.  Score a V shape, from the outside of the middle square (on both sides) to the pencil mark.  Do this on the opposite side as well.  There are only three squares not scored and they are on the inside.
The rest is all about decoration.
Card:  Baja breeze, dsp - greenhouse gala, certainly celery
Acc:  Jumbo eyelets, certainly celery ribbon (retired)
Tools:  Big shot, top note, scallop eyelet border punch.
Thanks for stopping by and have a good day......

Saturday, April 2, 2011

Flip Flop Album

Hello everyone,
  I could not decide what to post today.  I have been busy making lots of different bags to show you and then I realised I have to make some more Easter creations (have to get onto that one).  But I thought I would share one of those things that my sister really loves. By the way she loves the briefcase I just did for the Just Add Ink Challenge (oh yeah!!).  She is very hard to please - everything has to be very useful and not too overdone!  Lucky she never looks at my blog LOL.
  Anyway onto the flip flop, which is also one of my all time favourites:
Sorry, there are no photo's yet, they are all still on my camera.  But I love to have photo on the front cover, so you know what your album is about (for me anyway!)
Just as you open the cover, but don't worry, there is more......

See, now how great is this.  You can fit so many photos in here (lots of 6 x 4) and lots on the tabs (both sides) and of course I love to put tags in all my photos so I can tell a story as well.

Here is one I did earlier, like, a lot earlier.  Can't believe time goes that quickly.

Like I said, I love tags, I love to tell a story and think there can never be enough writing!!  The flip flop is great.  When you are putting it together you start from both ends and flip one side, flop the other until you come into the middle.  At the very beginning, before you put on the dsp just squash the book together (you will see what I mean when you go to make it).  Don't worry if it doesn't seem to sit right, because when you have dsp and photo's on, you don't even notice anything but how spectacular it looks!
Just going to give you some quick instructions but if you ever want me to do a tutorial, just ask.
8 pieces of card  6" x 12"
         score 1 piece at    21/2", 3", 9" and 91/2"
         score 7 pieces at   3" and 9"
7 pieces dsp  51/2" square
ribbon

Adhere 7 pieces of card together at 3" fold so two pieces are together and so on.
On your last piece at the 21/2" fold use your slot punch or similar punch, to punch holes in the middle so the ribbon can go through.  Then attach your ribbon and stick your cover to the rest of the book.
Adhere dsp to middle pieces.
Decorate and add photos.
This book has been around for ages but I never tire of seeing it on blogs.
Card:  Bashful blue, not quite navy pear pizazz, river rock and dsp - celebrations
Acc:  River rock ribbon (retired)

Have a lovely evening....