Friday, December 31, 2010

2-4-6-8-box

  So this is my other version of the 2-4-6-8 box.  The one this morning did not come up as well as it looks (unfortunately), and it really is a sweet box.  I'm happier with this photo.  Unfortunately I have no recollection of where I got these instructions so I will give you a quick run down (any problems just let me know)

81/2 x 51/2 card, scored at 2",4"6",8" so you have the 1/2" left over for the flap.
                            score 2" on the 51/2" side and cut the bottom 2" x 1/2" flap off, so you are left with the top flap of  31/2" x 1/2".
Cut the score lines up to the 2" score.  Fold all score lines and decorate your box.  I think it is easier to decorate before you put it together.
Once you are happy, place tape on the 1/2" and adhere the flap on the opposite side.
Fold all the bottom pieces under adhering each time to keep the base of the box secure.
Pinch sides of the box together and using a crop-a-dial punch a couple of holes on the sides.  This will keep your ribbon in place.
Or you can use a square punch and punch in the middle of the four score lines (and 1/2 of the punch on the first panel of 2") before sticking together.
I just love using the crop-a-dial and use it whenever I can.
I hope you have fun with this great box.
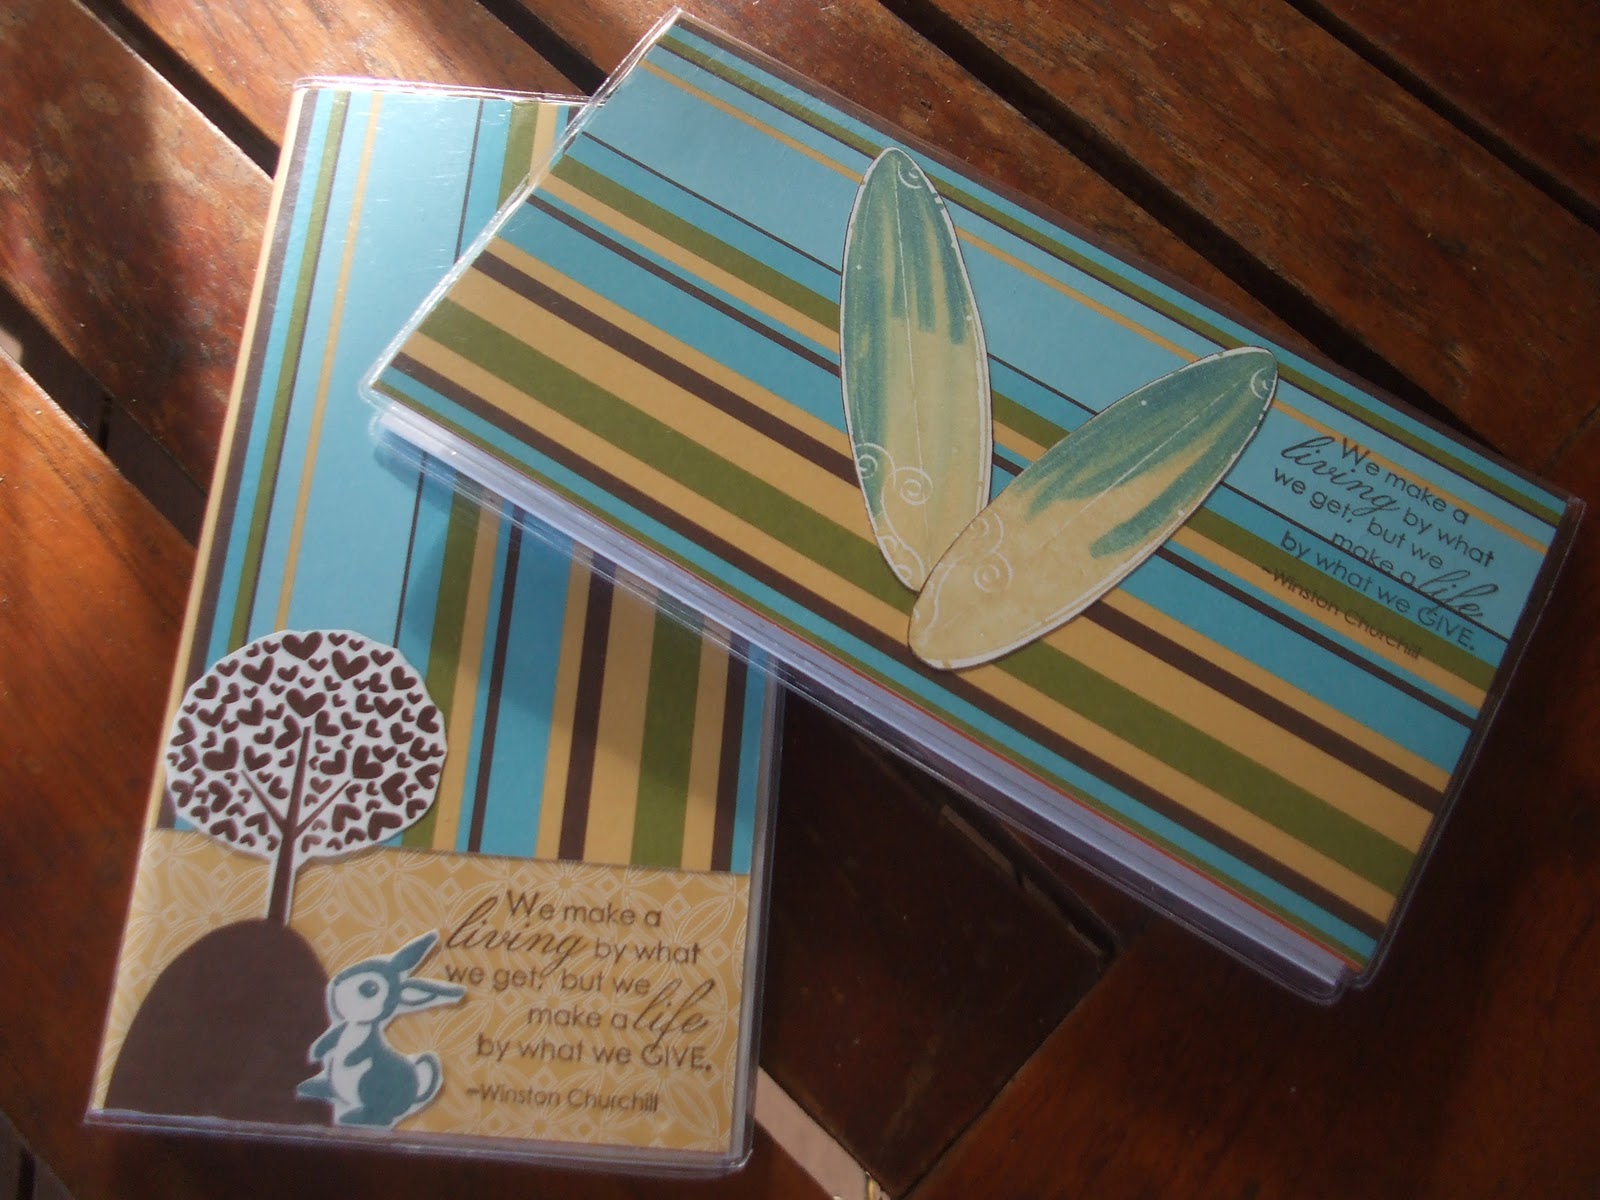
Stamp set:  Upsy Daisy
Card:  Chocolate chip, dsp- play date
Ink:  Versa Mark
Acc:  Chocolate chip ribbon, white embossing powder
Tools:  Heat tool and crop-a-dial
Thanks and have a great afternoon..

Thursday, December 30, 2010

Tooth fairy card

Hi All,
  Sorry, I missed my morning post, went out and did my Boxing Day Sale shopping!!!!  I know, better late than never.  It just rained so much and I didn't want to go out into it, and now of course, it is the last day of 2010 (oh, so sad).  So I thought I would get in my shopping for the last day of this year......
So this is my Tooth fairy card, plainer version first with a detachable bookmark.
Stamp set:   Tooth fairy (summer mini)
Card:  Marina mist, bashful blue
Ink:  Chocolate chip, night of navy
Acc:  basic rhinestones, choc chip ribbon, paperclip, dimensionals
Tools:  Cutter, scallop circle
The cards are very basic so I haven't been giving any instructions but I have them written down if anyone would like to let me know.
I did score around the edges of the matting to give a different look.
Oh, this is a better picture, a lot clearer.
And now for my 'Up Version'

With this card, I used the piercing tool and  mat around the edges.  Love this look and I tend to use it a lot.  The tooth fairy is a bookmark again, I just hid the paperclip under the top matting.
So all the details are the same as the above card except for dsp- play date and the piercing tool and mat.
Hope you have a lovely day for the last day of 2010....

Wednesday, December 29, 2010

Mini photo album

Good morning,
  I made a mini photo album that I have wanted to make for ages and finally got to make.  I found this tutorial on Schwooo, Angie's blog.  She also put it on Splitcoast Stampers.  I love having written instructions in front of me.  When you are making the book you do need to place a piece of dsp on the front and back of the inside covers (chipboard - I also used the card in with the dsp!!, didn't have any chipboard here at home).  Watch how tight you put in the jumbo brads as well.  So now on to the book
The front..... I love the play date dsp, so I kept it pretty plain.

The pages turned out.  Sorry I don't have any photo's on them as I am giving it as a gift with a chocolate bar in there.  Yes there is enough room to put a little surprise in there for someone..

The back of the album..
  I love mimi albums so expect to see quite a few on here in the future.  That and 3D are my downfall.
Stamp set:  pocket silhouette
Card:  Riding hood red, tempting turquoise, old olive, whisper white and dsp - play date
Ink:  Old olive
Acc:  Jumbo brads
Tools:  corner rounder, word window punch, crop-a-dial, round tab extra lge.
have a great day..

Tuesday, December 28, 2010

Hello

Good morning,
  How quickly has December past us by, well nearly, only a couple more days.  Another year almost over!!
My quick, easy card, and I must admit I did like making this one, I love the owl, he is so cute.
Stamp set:  Hello again, Woodgrain
Card:  Kraft, chocolate chip, pink pirouette
Ink:  Chocolate chip
Acc:  brads, dimensionals
Tools:  Two-step owl extra lge, two-step bird extra lge, boho blossom, circle scissors

  And, my 'Up Version'.  I tore the edge of the card, matted the 'hello', and circle and added a couple of extra flowers in tempting turquoise.  So still an easy, simple card to make.
Have a great day..

Monday, December 27, 2010

Kind

Good morning,
  Even with all the rain, I am so excited.  I just worked out how to turn my photos around.  All small steps!!
So my card today I wanted to keep plain and simple and then I made an Up Version.
Stamp set:  Baroque Motifs
Card:  Garden green, pumpkin pie, chocolate chip and whisper white
Ink:  Chocolate cip, garden green, pumpkin pie
Acc:  Brad
Tools:  Scallop Oval, lge oval, piercing tool and mat.
                                   Now for my Up Version
So my Up Version is exactly the same but I distressed the edges of my first two mattings with a pair of scissors and instead of piercing, I drew some lines aound with the garden green pen.  Added a couple of small flowers, still out of Baroque Motifs with a bit of bling (basic rhinestones).  And of course added a couple of extra mattings for my wording.
Have a great day..

Sunday, December 26, 2010

Valentine Box & Cards

Good afternoon,
  Yes it is afternoon, I had to get over Christmas and all that food.  And today finally started making some cards, though I must admit I am much better at 3D, so stay tuned to see my cards!!!  I decided that I am going to post a Valentine project once a week and seeing I can't get a good picture of my cards today, I am going to show you this cute box that holds 3" x 21/2" cards, I also folded up some computer paper to make little writing notes, don't think I took a photo!  But if you are really interested, just let me know and I will make sure to take a photo.
Oh, I didn't even take pictures of the cards, I punched out hearts and glued them to the bottom of the cards.
Lynda has a great tutorial, as per usual (this woman is unbelievable, I love everything she does)
Card:  Real red, whisper white, dsp-play date
Tools:  Scallop circle extra lge, heart to heart extra lge, 13/8", 11/4" and 1" circles.  Yes I love my punches.
Just let me know if you have any problems with the tutorial but I find Lynda's tutorials easy to follow.
Thanks and have a great day..

Saturday, December 25, 2010

Merry Christmas

Wishing everyone a very Merry Christmas and hoping you have the best Christmas yet!  My last post for Christmas (how sad, over all too quickly)
I absolutely love this card.  I cased this from Karen and have made quite a few for different occassions.  I have not used the typical dsp for this, but I love these colours for Christmas.
Stamp set:  Snow swirled
Card:  Night of navy, baja breeze, whisper white, pear pizzazz, greenhouse gala dsp.
Ink:  Night of navy, baja breeze
Acc:  Brads
Tools:  Round tab extra lge, 13/8 & 11/4 circle punches, slot punch, spiral border, big shot, fancy favor
            die cut.
Any problems with measurements, just let me know or if you would like a tutorial.  Or the next time I make one, which will be soon, I will write down my measurements then.
Sorry, been a big Christmas day and an early night is looking pretty good........
Have a really lovely night/day...

Thursday, December 23, 2010

Snowman soup

Good morning,
  A good friend of mine is calling this; Christmas Eve Eve.  So on this beautiful overcast day I will call it the same.  And Bev I am cooking all day too, well that is my plan.
  So onto my last present for the family:
Snowman Soup, with a chocolate, candy cane, hot chocolate sachet and marshmellows.  I should have put the ingredients on the cup but I am really pushing for time so I have left it plain except for the tags.
Stamp set:  Got treats, Snow swirled
Card:  Baja breeze, whisper white, night of navy
Ink:  Chocolate chip, baja breeze
Acc:  ribbon 1-1/4" striped grosgrain
Tools:  Scallop circle punch, lge tag, extra lge tag, circle scissor plus
tutorial for the mug from scor-pal (really easy instructions) but if you would like me to do a tutorial, more than happy.
SNEEK PEEK

And a couple of favourites that I have made during the year and will make again next year with in colours:


Merry Christmas everyone and I wish you the happiest day,
have a great day...

Wednesday, December 22, 2010

Advent calendar

Good morning,
  A good friend, who moved back to the States, Kimberley, sent us the most wicked card.  Sorry it is not Stampin'Up!, but I have to show you.  I'm going to work on it and make one for next year though.  I think it is so gorgeous:

  And now my next gift for my family,


    These are little message books I found in Coles and have covered.
Stamp set:  Office Accoutrement (retired)
Card:  Whisper white, dsp - newsprint
Ink:  Chocolate chip
Tools:  Scallop punch
  And tomorrow I'll have snowman soup in a coffee cup!
Have a great day..

Tuesday, December 21, 2010

Gifts for Christmas

Good morning,
  Three more days to Christmas, I think I am excited, just joking, know I am excited, can not wait.  I have a few gifts for my family on the big day (that I will have on the dining table) to surprise them.  Firstly, 2yr calenders from Sams Warehouse;  Thanks to Robyn for telling me about them and Sonja for getting them for me.  I had to go out and get more, 24 in total and I am sure I could do more!!!!
This one is covered with dsp (newspaper print) and very vanilla cardstock.  On all the calendars I added the saying from the level three hostess stamp set:  very appropriate, We make a living by what we get, but we make a life by that we give.... Winston Churchill.  Isn't that saying just so beautiful.  So I put that on all of them in chocolate ink.

And these ones with Play Date (one of my very favourite dsp).  I made sure I made 'boy' ones with the Just Surfing stamp set, colouring in the surf boards with so saffron and taken with teal.  And the other sweet one was using Forest Friends and Love Defined (in the new mini catalogue).  Two more gifts to show you over the next couple of days so stay tuned....
Have a great day..

Monday, December 20, 2010

Mrs Clause

Good morning,
  As promised, here is Mrs Clause.  The card is a mini apron, I was using up all the left over bits, even though I don't believe she would wear a mini apron myself!!  I should have taken a picture of Santa's overalls and Mrs Clause's apron together.  Oh well, next time!!
  There is a great tutorial on Lynda's blog.
Card:  real red, whisper white
Acc:  dazzling diamonds glitter
Tools:  heart to heart extra lge punch, lge scallop punch, nestabilities.
Not much to this one and easy to make.
Have a lovely day..

Sunday, December 19, 2010

Santa's Overalls

Good morning,
How cool do Santa's overalls look, and like I said I need to make a card with all my projects now.  Not sure if I like this card a lot but it doesn't matter, it goes with my box!!
So I got this tutorial from Lynda, love her site.
Stamp set::  Snow swirled
Card:  Real red, black,whisper white, kiwi kiss (retired colour) - old olive would be lovely.
Ink:  whisper white
Tools:  crimper, slot punch
Have a great day  (sorry you are going to have to put up with my bloopers until I work out this computer - my writing is all over the place today)
Oh I forgot to mention, tomorrow I will show you Mrs Clauses' apron..

Saturday, December 18, 2010

Itty Bitty Santa

Good morning,
  So here is my itty bitty Santa, I mentioned yesterday.  I am sorry the quality of the picture is not better but this is Santa made out of the tag punches.  He is so tiny.  And of course I made a mittle miniture card to go with it which would be cute as gift tags.  Not sure if you want the link again, but here it is.
  I'm not going to put any details up today as it is the same as yesterday.
  Have a lovely day..

Friday, December 17, 2010

Little Santa & Card

Good morning,
Only eight more days till Christmas, everyone excited!!!  I'm going to be sorry when Christmas is finished this year, I love all the red and green and all the lovely creations on blogs, love it.
So onto my Santa box and card.  I am into trying to make the card look like the box so, hence the front of my card.  I got a great tutorial off Karen's site.  Thanks again to Tia for the help with the one word link.  You'll have to check out Tia's site, she has helped me so much with understanding my blog.
Oh, I just realised this is a large box, if anyone is interested in instructions just let me know, I will put the tag one on tomorrow which is the one from Karen.  I just made my own box and tags to fit front and back.
Stamp set:  Snow swirled
Card:  Real red, whisper white, black, basic grey
Ink:  Real red
Acc:  Hodgepodge hardware (retired) but great silver set in catalogue
Tools:  Crimper, sponge
Have a lovely day..

Thursday, December 16, 2010

Raindeer Poop


Afternoon,
Yes that is right, it is afternoon, we lost power last night from five till ten today, grrrrrrrrr.  Anyway we have power now and that is all that counts.
So who is for some raindeer poop?  And who wants the poem?
Raindeer Poop
Santa's been making a list and checkin' it twice,
He knows that you've been naughty - NOT nice....
So here's the scoop,
Santa has left you Reindeer Poop!
No stamp sets used
Punches, Two-step owl extra lge, Two-step bird extra lge, top note die (everyone needs a big shot).
black marking pen for the mouth.
There are lots of versions of the raindeer out there and it is fun checking them all out.
Have a great afternoon.
ps  I will get my photos worked out eventually, sorry

Tuesday, December 14, 2010

Christmas card


Good morning,
Funny how far Christmas seems until the last couple of weeks, when you realise how behind you are with everything.  I just get surprised at how quickly it comes around, STILL.
So how is this, I have made a card, have to try some different colours, not 100% happy with it but wanted you to see what a different card this was.  It does stand by itself too....
Sandi Maclver has a stunning card on her site and a tutorial http://www.sandimaciver.com/sandi_maciver/tutorials-folding-cards-projects/ so good luck and have fun with it, I'm definitely up for more but need to let the creative energy flow a little more....
Stamp set:  Tree trimmings
Card:  pacific point, riding hood red, very vanilla, dsp - jolly holiday
Ink:  riding hood red
Tools:  2 step bird punch
Have a really lovely day, sun shining brightly here so very happy.  Though I do love the rain...

Sunday, December 12, 2010

Christmas Tree Trimming

Hi, good morning,
Ready for another busy day, we certainly are, the silly season has definately started for us.  Isn't this heart just the cutest.  I have made quite a few for the tree so Santa can put a couple of extra treats in them, not that I have told my son that.  He can find out on the day.  If you would like to make some there is a great tutorial on Adela's site http://cbyar.blogspot.com/2010/01/hanging-hearts.html
Card:  dsp - jolly holiday
Acc: -  ribbon.
Try one, really quick and easy (can you tell I like the quick and easy).  No, seriously, I love any 3D but I will start to post some cards soon?????!!!!!!!
Have a great day..

Saturday, December 11, 2010

Perfect box

Hi,
Guess what, it is afternoon, knew it wouldn't last with me doing all morning posts.  Actually we went and stayed at a friends last night so this has to be an afternoon post. 
This is my new all time favourite box, absolutely love it.  I cased it from http://hemidemisemiquaver.wordpress.com/2008/06/07/graduation-box-and-template/   and she has the tutorial for you.  Of course any problems just let me know.
Stamp set:  Winter Post/Season of Joy (pacific point)
Card:  Old olive, very vanilla, dsp - jolly holiday    or   Pacific point, baja breeze, whisper white
Ink: Old olive       or pacific point, baja breeze
Acc:  Old olive ribbon    or In-colour baja ribbon (retired stock) and diamond jewels
I hope you could undeerstand that but I thought I should put down the two different colour combinations I used for the two boxes.  Next time I might just pick one and if you need to know the other you could always e-mail me.
Thanks and have a great night..

Friday, December 10, 2010

Christmas Bon Bon

Goodmorning,
Love Christmas, love all the green and red.  I always make bon bon's for the family and I found this sweet one on Well Scripted & Inspired by Nature.  I learnt a trick on Crafters Anonymous, so I'm going to try it now and see if it works http://mirrorimage.typepad.com/caroleannes-1st-blog/. Yeah, thanks Tia.  So now I can give you links when I case someone's work.  Caroleann has some beautiful projects and she has a great tutorial on making these bon bon's.
Stamp set: Seasons of joy
Card:  Old olive, riding hood red and whiper white.
ink:  riding hood red
Acc:  dimensionals, twine, scallop oval punch, lge oval punch and small oval punch
Have a great day..

Thursday, December 9, 2010

Pizza box and cards

Good morning,
Today I have a pizza box (love these, they are incredibly quick and easy to make and so versatile).  I cased the design off stamping connections (a demonstrator website).  And of course we can't have a box without something in it so I made 6 3x3 cards.
If anyone wants the instructions for the pizza box just let me know otherwise I will be making more in the future ( like I said they are quick and easy and always look good).
Stamp set:  Tree Trimmings
Card:  cherry cobler, old olive very vanilla and dsp - jolly holidays
Ink:  old olive, riding hood red (still have to get cherry cobler)
Acc:  old olive ribbon, dimensionals
have a great day..

Wednesday, December 8, 2010

Cute basket

Good morning,
This was such an easy basket to make from the 'basket and blooms' die cut, with little tags and flower on them.  They were fun to make and I love the simplicity of using the die cuts (for the big shot, they are great, everyone should have one).
Card:  baja breeze, chocolate chip, dsp- greenhouse gala
Acc:  rhinstone brads- circle fire
ps, sorry the photo wasn't better, still having a little trouble with the light.
have a great day.....

Tuesday, December 7, 2010

Santa triangle boxes


Good morning, yes I seem to do all my postings in the morning, love how fresh I always feel, that, of course, could always change.
I have made the big triangle boxes before but how cute are these.  I love them and they are so easy to make.  I found them on Lynda's blog (Lynda's Quiet Time), sorry, I will get a link, still working that out.  Lynda has detailed instrucions for the boxes.  I made the cards as I wanted to give them as Christmas presents and wanted the card to go with it.  They haven't come out so well in the photo but I am very proud of my cards.  I wanted simple and I think they are very simple.
Anyway, I wanted to see how Santa looked away from the red and I hope you think he looks as good on the pacific point and (last seasons in-colour) kiwi kiss (I am just trying to use up all my card, and of course I have heaps, but slowly it is disappearing.
Stamp set:   Contempo Christmas
Card:  pacific point, chocolate chip, whisper white, blushing bride, real red, kiwi kiss, dsp- jolly holidays
Ink:  whisper shite, blushing bride
Acc:  gel pen, scallop circle, 5 petal flower, 13/8", 1/2" circle punches, word window punch.
Have a great day..

Monday, December 6, 2010

Lolly tube gifts

Good morning,
This morning I have these cute lolly bags (I brought mine from a company in America, http://www.clearbags.com/) And of course I am making Christmas bags at the moment.  My first one is a poinsetta using scallop circle punch for back and front matting.  Then two '5 star punch' in real red - scoring the middle of each flower so you can bend them easily.  Then a brad to hold it all together.
My next one is from Got Treats (I love this set and will get heaps of use out of it).  This time I used the real red scallop circle, old olive 13/8" and whisper white 11/8" with stamped image.
Have a great day...

Sunday, December 5, 2010

Album & Card

Good morning,
This is a favourite of mine, an album and matching card.  I love this as a present to send to someone with mini cards and tags inside.  I have looked everywhere I could think of for the translucent envelopes, here in Australia but without any luck.  A friend of mine, Beverlee sent these to me.  Hopefully Stampin'Up! might start selling them here in the future!
Stamp set:  Got Treats, Contempo Christmas
Card:  chocolate chip, old olive, real red, whisper white, DSP
Ink:  real red, old olive, chocolate chip
Acc:  brad, ribbon, twine, ornamental punch, 1/2" circle punch, 13/4" punch, eyelet border punch
Have fun, Theresa

Saturday, December 4, 2010

Houses for gifts

Good morning, what a beautiful day, we've had rain all week and now it is overcast and everything looks green and summery, love it.
These houses are made using a tutorial from andrea walford that I purchased a while back.  I'll do another post with the cards but I was using these and putting homemade biscutes in them for Christmas presents.  I have used a variety of colours as I say I will do another post and be more specific.  Have a great day.

Wednesday, December 1, 2010

Explosion Box

I love the explosion boxes, they are so quick and easy to make.  And of course these days we have to have a flower on top.

stamp set:  Seasons of Joy
card:  Old olive, very vanilla, jolly holiday DSP, cherry cobler
ink:  Cherry cobler
accessories:  brad, scallop punch, boho blossom punch

More quick instructions:
Card 7 1/2" square,   scored 2 1/2" and 5"
DSP (for lid)  4 1/2" square,  scored 7/8" on all sides
Punch cherry cobler with scallop punch and then 3 of dsp.  Punch cherry cobler boho blossom punch to use one of the small flowers for the middle.
Scrunch all scallops except for the cherry cobler which will be your base.  Unscrunch scallops placing on top of cherry cobler with boho blossom.  Prick hole through (with mat pack) and insert brad.  Put aside.
Lid:  fold all score lines cutting into score lines, to make lid.  Place sticky on the four tabs and stick down.
Bottom:  fold on all score lines using valley folds on corners so they go inside the box, place your lid on and stick your flower down.
Finished.  Any problems making these, just let me know.  Still trying to get use to blogging so one day I will include photos of proceedures.
Thanks...