Saturday, October 29, 2011

So Sorry But I Have Some Cute Little Scrapbook Holders

Hi all,
I am so sorry that I haven't done any posts but the flu got the better of me and I really have been so sick with it, my ears in particular are in massive pain, so I've been popping the pills, panadol and baby nurofen (surprisingly it works!!!).  I can think a little today which is good.  As you can tell I didn't add anything to my box (from my last post), I just couldn't work out what to do and love it the way it is!!!
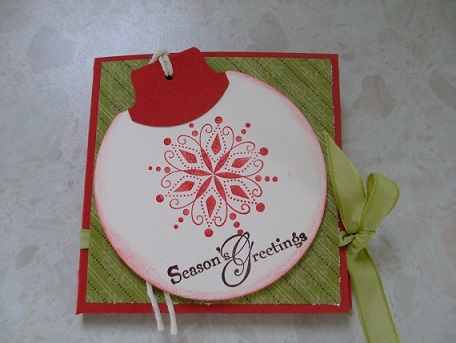
I will have a tutorial for you tomorrow (hoping I am much better to be able to concentrate and write, otherwise, I would hate to think what I would have you making!) but just going to show you another creation from the holidays when Sonja and I got together.  It was when we were making another book, I showed you earlier and (I was looking after a girlfriends children and her daughter wanted to scrap, so I handed her some scraps and she started making these little wallets.  Well, not these ones as such but it gave Sonja and I the idea and here is what we came up with:


 Aren't they just the cutest.  The only problem is I don't know there the instructions are but if you are interested please e-mail and I will find them somewhere.  Now here is Sonja's:
She put the Halloween theme on with here Boo's.
I hope you have a lovely night, only a couple more days till Halloween, love it, lol.

Tuesday, October 25, 2011

Unfinished Business

Hello,
So how is everyone?  Had a great day?  I won't even tell you about mine but I will show you a box we made, ummmmmmm, can't remember, a couple of months ago (I think!) at Crafter's Anonymous.  Love the box but couldn't work out how to decorate, as I absolutely love the box just the way it is.  But it does need something.  So tonight while I am watching X-factor I will try and work it out and let you know how I go tomorrow!  But for tonight, I will show you why I am struggling so bad.  This is a great size box and I am struggling to want to give it away!!

See, how cute is this box, I love it!  So you will have to check back tomorrow to find out if I did anything with it, lol.
Card:  Soft suede, dsp- soft subtles and very vanilla
Tools:  3/4" circle punch.
I know, you think I should finish it!!
Have a lovely night and I'll see you tomorrow....

Sunday, October 23, 2011

A Christmas Card With A Difference

Hi All,
Hope you all had a lovely weekend.  I was sick for all of it and still feeling under the weather, it is not winter so I don't know why flu's and colds are still around.  Anyway another day.......
And today, I have a card, just for something different, lol.  I cased this card from  Becky, I think!!!


My cards (made during the holidays with Sonja).  What I love about these cards, is the message pops out and I haven't seen anything like them around. Now on to Sonja's:
The same, yet different, hehehehehe.
Now on to directions;
4 1/4" x 8 1/2" card  scored  2 1/4" each end of card
3 7/8" x 3 1/2"  whisper white card for insert.
Find centre of each end at 2 3/4" and make a light pencil mark.  Cut from 2 1/4" score line to light mark, when done both sides (and at each end) it will give you the triangle shape.  This will overlap so you can stick this bit down.
Punch slit on either end of the card, as you can see from above, this is where your whisper white card will slip into.
Apply stamped image to from over the flap so you can't see where it has been adhered.
Another quick and easy project.
Stamp set:  Seasons of joy
Card:  Old olive, very vanilla, dsp - letters to santa
Ink:  Old olive
Acc:  Ribbon and brads
Tools:  Ornament punch, word window and slit punch
have a lovely evening.....

Friday, October 21, 2011

3 by 3 Scrapbook Album For Christmas

Hello,
Hope everyone has had a lovely week.  I have spent most of the day in bed with a bad case of the flu but it's the weekend and plenty of time to get over it.  Today I have a really cute little album/card, not really sure but I can always change anything into an album!!
I really think it is the paper that makes it so cute as well, I am so loving this designer printed paper.  I made this a little while ago with Sonja (my stamping friend - over the holidays) so I will have hers to show you as well.  So on to the inside of mine:

I actually wrecked one of the pages (that was my favourite) and of course, I couldn't throw it away.  I will show you soon what I did with it, it is just a secret at the moment, promise to let you in on it soon.


So this one is Sonja's, as you probably guessed!  And the directions for this cute, simple little scrapbook are:
Card:  12" x 3"   scored at 3", 6" and 9".  That is it and you add all the designer printed paper and embellishments you like.   I intend to make heaps more for Christmas.
Have a lovely night and thanks for stopping by.............

Thursday, October 20, 2011

Another Gift Tag Set For Christmas

Hi All,
I'mmmmm back.  And I have another set of photo's to show you of the gift tag set and then I'll give you the super quick instructions:


Actually there were another three sets to show you, as I said, very quick and easy to make.  Make sure you try.
Card  7 1/4" x 4 3/4"  scored at 3 1/2", 3 3/4" and 7 1/4"
                                   scored at 3 1/2"
Fold on the score lines.  Cut the middle tab out and using a crop-a-dial punch four holes (altogether) to run ribbon through, as shown in the picture.  That is all there is to it.  Then decorate.
You can use your circle scissors but I cheated and used the nestabilities and then put on a tab punch.  As I said this was cased from Becky at Inking Idaho.
thanks for stopping by again, lol.......

Wednesday, October 19, 2011

Ornament Gift Tag Set, Ready for Christmas

Hi there,
Oh my, how many beautiful creations are out there.  Every time I go onto someones blog, I think I have to make that, and that, and that and I tell you, I don't know how I will ever get everything made, that I want to make.  I suppose I should just admit defeat!!!
Well tonight, I have cased this gorgeous gift tag set from Becky (yet again!)
How adorable is this!  I even used a dotto on the front so whoever I give it to can use it, and then when you open it up:
Four very cute gift tags, and I know we have all seen heaps of portfolio's (think that is what we call them - if not, I'm putting it down to sick and tired, lol) but this is one of the easiest to make.
And this is them out, so you can see everything, I probably should have put a nice sentiment on there!!
Anyway on to instructions:
Oh, you are not going to believe this but I can't find my measurements (remember sick and tired!!) but I promise I will put them on tomorrow.
Stamp set:  snow swirled
Card:  Riding hood red, whisper white and dsp - retired
Ink:  Chocolate chip and riding hood red
Acc:  Ribbon and twine
Tools:  Crop-a-dial, circle scissors and round tab punch
And that is it until tomorrow, see you then with instructions,
have a lovely night.....

Tuesday, October 18, 2011

Christmas Milk Carton

Happy Tuesday,
I'm not feeling the best today, woke up with a sore throat and it has managed to get worse even with panadol etc.  Just feel like rugging up in bed but thought I would do a quick post first.  I actually started making this milk carton a couple of years ago (believe it or not) and thought I should hurry up and finish it, and sorry, I can't remember what I have done with the pattern but not to worry as it will turn up eventually and then I will share it with you.  You could just use the milk carton die, it will just be a little smaller.  I was going to make this Halloween but I just love the Christmas paper so much, I couldn't resist.
Looks a little lop-sided, doesn't it, but it actually isn't, maybe it is the box, or maybe it is just your eyes!!!!
Card:  Basic black, pink pirouette, old olive and dsp - letters to Santa
Acc:  Ribbon and twine
Tools:  Crop-a-dial, lge scallop, 1 3/8" circle punches.
A quick and easy project.
Hope you have a lovely evening.......

Monday, October 17, 2011

How About A Batty Halloween

Hello,
What a day we had today! Absolutely beautiful yesterday where the kids were in the pool all day to being cold and miserable today, weird!  And my throat is starting to get sore, so maybe a lovely cold/flu to go with it.  But back to the main reason we are here.  My Batty gift pouch that I cased from my cyber friend Becky, love everything she makes and have bought a couple of tutorials but went back years on her blog and found this cute little chocolate holder, or whatever else you like to call it, for me, it is a chocolate holder!!!!
Oh, the bat punch came paper punch addiction and I will let you know how to do that as well.
How super cute is this inside??  I absolutely love it!.  So first to let you know how to make the holder:
6 1/2" x 3 1/2" elegant eggplant   scored 3", 3 1/2"  fold on score lines to form the cover
7" x 5 1/2" dsp - Frightful sight.   On 7 " side score 2" in from both sides.  Adhere overlapping part.  Use 1 1/4" punch and punch 1/2 circle from centre on both ends, just as above.
Centre paper lengthwise on inside of card book and punch 2 1/16" holes through both layers (about 1") apart.
Thread cord or in my case, ribbon through holes and tie a knot.
Attach ribbon to outside of cover and decorate.
Now for the Bat:
Ornament punch with the top cut off - for the body
2 x lge ovals and using 3/4" punch half circles to form wings
2 petals of 5 petal punch for the ears
1/2" circle punch for the face - you can't see it, but it is on there.
tip of one pink petal for nose, though I just cut a small piece myself
If you have the star punch cut two tips for his fangs, again I just cut the shape (one of the few punches I don't have).
2 lge circles from owl punch and shape into tear drop.
You can see from the picture how to put together and the bat is such a quick one to make.
thanks for stopping by, have a lovely night......

Saturday, October 15, 2011

My Secret Sister Gift I Sent

Good afternoon,
Yes, I am posting early, just trying to do a little craft for a class I hope to do, for teacher gifts.  But I thought I would quickly show you what I made for my secret sister, Naomi Whittaker.
Naomi loves purple so I tried to get as much purple in there as possible, all different shades of it.  If there is anything you want instructions for, just let me know.


A Christmas card and milk carton with, yes you guessed it, purple mentos.
A Halloween pizza box with some goodies inside


A card, which I will show you in a minute, these pegs have magnetic tape on the back so they can attach to the fridge

The outside and the inside of the card and now on to something just for Naomi:
This has a notebook, telephone message pad and pen inside so she can leave it by the phone.  I don't know about you but I am always looking for something to write on, thank goodness for cordless telephones.

How cute are these flowers, they are just a scallop square punch folded up a few times to make an iris (think that is what they were, lol.  I will show you another time, on something else).
And that was my bundle.  Thanks for stopping by,
have a lovely week......

Secret Sister Swap

Hello,
We are in for a big storm so I am trying to quickly do a post and I couldn't do it before now as I didn't know who sent it to me and I have only just found out.  Rachael Hecker is one talented lady and I just tried to find her blog and couldn't find it, so I will keep you updated, as her stuff is ohhhhhhhhh.  Wait and see for yourself:
 Now isn't this just the best to receive from someone!!!
 And this little calendar would be great for a teacher present!
 A cute notebook,
 And it opened, just nice plain white paper
 A post-it-note holder with pen, oh yeah
 the book opened
 And my favourite, a bag full of goodies
And a last picture of everything together, even the chocolate I ate, lol.
have a lovely weekend.....