Hello,
I did promise a tutorial and I am finally getting around to doing that for you. First the box. Love, love this box. This is the same as the Halloween one, I just thought I would give you a tutorial so it is easier to make. This is cased from the talent: Big Ideas From A Little Girl. love her blog.
Isn't she just the cutest. I made this box with quick instructions on the 29th September, 2011
Old olive Card: 81/2" x 6" scored 1", 4", 5" and 8"
then score 1/2", 1 1/2", 4 1/2" and 5 1/2"
Whisper white: run through the big shot with dot to dot embossing folder for 3 pieces 2 6/8" x 3 1/4" leaving one free to stamp sentiment on
Dsp - letters to Santa: 2 1/2" x 3"
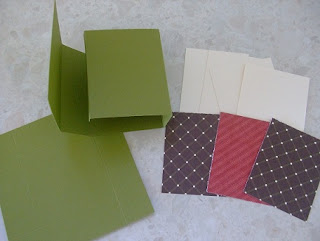
Fold on score lines
Make box by cutting on corner score lines and adhering. As you can see below I made the wrong size (pumpkin pie) and had to re-do the box (good excuse to make another at a different size). It is that easy to make a mistake when you lose concentration. Just had to show you, don't want you to think I am perfect, lol. hehehehe
Taking your lid, put a piece of adhesive on skinny strip. Line up the end with the adhesive to the score line and stick together, this gives you the flap at the top as well
Here is a picture with the draw inside making a box. Sponge the whisper white and stamp a sentiment on the plain white to make your card.
Adhere all the pieces on to the box
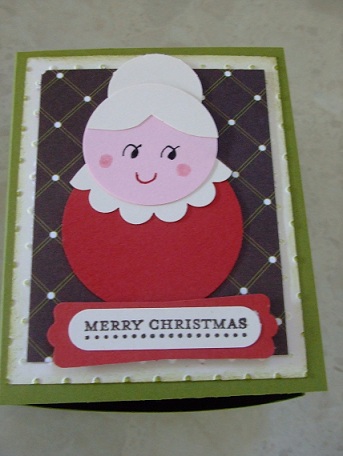
This is the lid ready for decoration,
I have put gorgeous punch art Mrs Clause on there and will give you directions tomorrow as I can't seem to find where I put them!!
Thanks for stopping by......

 Fold on score lines


Very Mrs Clause - love the box......you just made the pumpkin one so big so you could put more chocies in it...hehehe....Angie xx
ReplyDeleteOMGosh your Mrs Clause is adorable. I HAVE to make some of these. Gorgeous, well done my friend.
ReplyDeletex