Saturday, April 30, 2011

Deals of the Week

Hi all,
  We have some great deals going through the month of May.  A different special on each week so watch this space for details.  I can not believe it.  I have been having so much trouble putting the Stampin' Up promotion up here.  So I wrote it all up myself, and then thought, why not put up a photo of the set I do have.  Well, off I go to make something in Cottage Garden, to put up for you, and what do I do, forget to SAVE.  Oh me, Oh my, I can not believe it!!!!!!!!  So here we go, all over again:

Item             Page              Description                                              Price                    Sale
121578         p37          Tag Alongs Wood-Mount                          $31.95               $19.17
120468          59           More Monkey Accessories Clear              $23.95               $14.37
121550          59          More Monkey Acc, Wood Mounted           $29.95               $17.95
120003          75          Cottage Garden Clear-Mounted               $24.95               $14.95
119163          75          Cottage Garden Wood-Mounted               $32.95               $19.77
121494          98          Compliments to the Chef  Wood               $35.95               $21.57
The deals of the week promotion lasts 1-31 May.  There is no limit on the number of Deals of the Week items you may purchase.  However, if we run low on product we will return the product to full catalogue price before the end of the week.  If this happens, we will announce it on the Stampin' Up website homepage.

So if you are interested in any of the above, get in contact with me during the week.
Now here is my surprise of cards and tags from the Cottage Garden Stamp Set:
Tags, not my favourite colours but I am putting it with a box I made a while ago and posted.

A couple of 3 x 3 cards as well.

And the box I made previously with the tags and gift cards.  Now it is a nice little set to give to someone, even a hostess at a party!
Stamp set:  Cottage Garden
Card:  Whisper white, elegant eggplant and always artichoke
Ink:  Elegant eggplant, regal rose and always artichoke
Tools:  Lge and sml tag punch and crop-a-dial
Have a lovely rest of your day....

Mother's Day Card

Good morning,
  Another Card, found this one on Dannie's blog (her details are on the side bar, to check out what she did and her tutorial).  I have seen it on other blogs but I followed Dannie's instructions.  Cute little card to put with a pressie for Mum.
I made two at the same time, but with two different flowers, so this is the first one.

And here is the other.  Just using two different punches.  I love my punches
And here are the two together.  Just be careful when sticking the dsp top note to the card top note that you leave enough room for the inside card.  It is easy to put too much glue or tape on and not be able to fit your card inside.
Card:  Riding hood red, pumpkin pie, very vanilla, dsp - greenhouse gala and wild wasabi
Acc:  Pumpkin pie ribbon, riding hood red ribbon, twine, brads
Tools:  5 petal punch, scallop circle punch, boho blossom punch, big shot, top note die and round tab punch
Cut out top note in card and dsp.  Score approx. 1" down on dsp and turn over for contrasting look.  Glue or tape down.
Same colour card  2 3/8" x 3 3/8"
Very vanilla/whisper white  2 1/2" x 3 1/2"
round tab punch same colour or contrasting colour for pull out.
Thanks for stopping,
Have a great day....

Mother's Day Tea/Coffee Bag Holder

Hi All,
  I am doing another post tonight as I have quite a few things for Mother's Day and am worried I won't be able to show all of them to you.  So you get two in one day, today.
  This is a gorgeous little holder I found on It's a Stamp Thing.  The link is on the other post I did today (card),  I really liked this holder and not just because she used my favourite stamp set!
I have used my markers on the stamp and for colouring, should have used the pencils or crayons but I do like this look.  All trial and error.


  With and without the tea bag in.  I have run out of coffee sachets and they would look great in there too.

  I am so excited, I am finally taking decent pictures, no matter what the weather!  I just have to work out my water mark and then I will be set.
Stamp set:  Morning cup
Card:  Rich razelberry, very vanilla, dsp - retired.
Ink:  Elegant eggplant, old olive, regal rose, river rock and chocolate chip
Acc:  Ribbon - retired
Tools:  Crop-a-dial
Vicki has instructions on her site but if you would like me to do a tutorial, just let me know.
Just some quick instructions:
1 piece of card 31/2" x 10 1/2"  scored at 3 1/2" and 7".  Cut last piece (that folds in) on an angle (seen in picture above) to fit in your tea bag and the rest is decoration.  Have fun
Have a lovely night.....

Friday, April 29, 2011

Happy Mothers Day

Good morning, yes I am still morning! Just.  Hope everyone day a lovely Easter, as you can see, it took me awhile to recover.  So I have been busy making some cute Mother's Day cards and boxes.  And I thought I should start with a card:

The outside and inside.  I am tying to decorate my cards inside now.  I have been very slack before.  I cased this card from It's as a stamp thing,  Vicki has some really beautiful cards on her blog but lots of work.  I love casing, there are so many beautiful works of art out there and when you case, you don't have to think, and I love that!!!
Stamp set:  24/7 and Well Scripted
Card:  Baja breeze, very vanilla, dsp - retired (sorry, I will be using a bit of retired stuff, as this is my all time favourite dsp and when better to use it than Mother's Day - so please excuse me for that)
Ink:  Baja breeze, old olive, regal rose and ruby red.
Acc:  Ribbon - marina mist, dimensionals and glue dots
Tools:  Big shot, vintage wallpaper embossing folder, scallop oval punch and lge oval punch.
Nice to be back, sorry if I am a bit erratic with my posting but sometimes I have so much study to do.  This weekend I am going to try and make lots of things so I have heaps for you to look at or make!!
Thanks for stopping by and have a lovely day....

Saturday, April 23, 2011

HAPPY EASTER

Happy Easter,
  I don't have a post this morning (I could have taken a photo of our stash but...) as Easter Bunny has kept us busy looking for eggs.
  Wishing everyone a happy and safe day today, 
Happy Easter xxxxxxx
Theresa

Friday, April 22, 2011

Easter Saturday Eggs

Good morning,
  What a lovely day we are having, bright sunny day.  And I have been busy making things for tomorrow.  I bought some plastic eggs from Spotlight yesterday and some cookie cutters and here is what I have done with them.  All ready for the family gathering tomorrow.  I love Easter and Christmas as you know everyone makes that extra special effort to be there, so we can all be together.  Love it, love it, love it:

I still have to tie some ribbon to the cutters and I was thinking of giving them to the Mum's  as they will be the one's helping the kids, he he he.
Hope you are having a lovely day....

Thursday, April 21, 2011

Good Friday Easter Basket

HAPPY EASTER
Hi all,
  This was suppose to be a morning posting but........  You know how it is, it is all about time and I didn't have enough of it.  But now I do, and here is a cute basket.  I still have to learn how to put templates up on the computer and when I do, I will let you know how to do this little basket.  I must admit I have seen some around and you basically have a triangle and cut the corners out(on an edge, if that makes sense).  I will make another one after Easter and try and get some type of instructions up for you.
  My sister's kids came over yesterday and we sat down and made each of the cousins one of these baskets.  The kids loved making them and they were incredibly easy.


  Yes, I love that little bunny and I have put instructions up for him before.  I never thought I was a punch art person but I seem to have some type of punch on everything I do.   Have a lovely day.....

Wednesday, April 20, 2011

Last Minute Easter Chick

Hello,   I was going to post this in the morning but I still have a couple of Easter projects to show you so I thought I better put it up tonight.  Only a few more days to go till Easter and we're all busy trying to make our last minute homemade gifts.  Well this one is definitely for you.  It is so easy and quick to make.  And everyone loves them.  I saw these on Frenchie stamps where she just adhered a chocolate in between the front and back.  Whereas I have made a little box as well, just so I can fit a couple of extra treats:
My cute little yellow ones, now how gorgeous are they.  But wait, I have pink:

I love my little pink ones, so sweet.  And here they are all together:

They do look a bit stunned, and you can add eyelids, I just thought they looked cool without them.  So here are my instructions:

The box:
61/2" x 21/2"  scored at 1", 23/4".33/4" and 51/2"
                                      11/2"  Cut as above picture and place tape where indicated.  I will show you another picture in a minute with the card turned over and taped.
2 x extra large scallop circle punch sponged
1 x scallop circle punch cut in quarters and sponged (only need 2 x 1/4)
3 x yellow boho blossoms  (2 for feet and 1 for head, I used a couple of different ones for his head as you can see with the photo, so choose which one you like) sponged.
The beak I cut a folded triangle, sponged.
The eyes are white from the owl punch and the black is from the large punch on the crop-a-dial.  My eyes change a lot, just go with what I feel at the time.

This is the tape on the opposite side, just so there is no confusion.

Putting my little chicks together...

Have put the back on and then I will put the front on.  For the last couple of boxes I did end up putting his feet on first, just see how you go.

And the last shot of them all together....

Tuesday, April 19, 2011

Mother's Day Purse

Hi everyone,
  Wasn't going to post today but I needed to get the last of my collapsible bags up (ready for Mother's Day).  And then for the rest of the week finish off with Easter, yeah!
  I cased this bag from Toni Sacrison but I just checked out her blog and it is all different since I printed the instructions so I don't know if you are going to be lucky enough to get it from there.  I did notice that she has put instructions and a template on Splitcoast Stampers (love that site).
You have to see this in person, so much prettier, you just have to make one.  My first was the best and I made two after that and kept doing the same mistake, not that you would know.  You only know when you have done it right the first time (does that make sense or have you just stepped into my world).  So here are another couple of pictures:

Absolutely love how these bags fold out flat.  And the great thing is they have so much room, you can fit so much in them.  You just have to make one.  I am going to write some quick instructions otherwise you know where to find it.
Score 12" x 12" dsp at 41/4" on one side, turn to opposite and score the same amount again.  Turn and score 21/2" on the other two sides.  Fold inward on all score lines.
Tape adhesive to all corners and fold inward, pressing into place, along the top edges.  As per my other bags you need to press the middle score lines to create the bottom of the bag.
Cut two strips of co-ordinating card 2" x 81/2" scoring each one in half.  On both ends score 5/8".  Cut away one corner on both ends.  Punch two 1/4" circles at approx. 11/4" from each end.  Insert ribbon for handles taping each end in place.  Adhere strips to dsp, making sure small flaps are inside and hidden.
Punch two tabs using the round tab punch from same card, taping to the centre of bag.  decorate as desired.
Thanks for stopping by....

Monday, April 18, 2011

Large Pillow/Bow Box

Hi All,
  Monday night again and I was busy on Crafters Anonymous doing a class, so much fun!  Tonight we made a very big bow (which I can halve for a smaller one) and a lovely big pillow handbag box.  Oh enough talking, I'll just show you:
  You know what else is exciting?  I have finally worked out how to take pictures at night!!  I know what you are thinking, but there are just some things a girl can't do!  And being technical is just one of those things for me!  As you can see though, I am coming out of my comfort zone and achieving, oh yeah!!
  As you know I can't give you the instructions but they are for sale on the crafters anonymous site.
Stamp set:  Funky four and Tiny tiny sentiments
Card:  Dsp - greenhouse gala, rust (retired), whisper white
Ink:  Chocolate chip, old olive and basic black
Acc:  Brad (you can't see it, as it holds the bow together)
Tools:  Lge and sml tag punches.
Thanks again to Julia for a great class
Thanks for stopping by....

Saturday, April 16, 2011

Chickie Easter Box

Good morning,
  Getting closer to Easter, how exciting!  Though I must say, I have eaten my fill of chocolate.  I am going to see if I can not eat chocolate till Easter Sunday now....... (this will be very interesting, anyone that knows me well, will be laughing right about now!!)  You have to at least try!!
  So anyone, as promised I have this most gorgeous chick box, that I am giving as a swap but I don't know when!  And I thought you might like to make it seeing it is so cute:
So this is what I am giving to my friend...
And these are all the pieces

Box is  81/2" x 41/4"   score  (41/4")  1" from ea side
                                   score (81/2")  31/2" from ea side
Cut the middle side flaps as above, add tape as shown, and attach box  (same as the bunny box)
2  x   top notes
1  x  full heart punch   (scored on two sides to form a beak)
1  x  1" circle  yellow (as above)  for the eye lids, so cut in half
2  x  1" circle  white  eyes
2  x  3/4"  circle  black for eye balls
Cut 3/4 of five petal flower punch for his feathers standing up at the back
1  x  scallop circle punch  cut in half for his wings

Sponge all pieces in either a similar colour or chocolate chip (could be a dirty chicken, lol).  Place tape or dimensional on all pieces as I have shown (ready to assemble)

This is my little chickie with his face, though he still needs his hair and wings....

Little chickie ready to rock and roll.  And here is a side view:
So easy to make.  Tammy from Dream, Create and Share has a great tutorial if my instructions are a little hard to understand.
Have a nice day.....

Friday, April 15, 2011

Chocolate Easter Bunny Card

Good morning,
  Like I said, I found my pictures of the card I sent to Kerry, so I thought I would show you and give a few instructions.  You won't believe this, but my printer is playing up and I have had to write out instructions.  And I always write the name of the site I find but I didn't this time @?3./.@#>#?>#?@.  Don't worry I will look and eventually find it!  Then I will let you know asap.  Oh I'm so mad at myself.  But here it is:
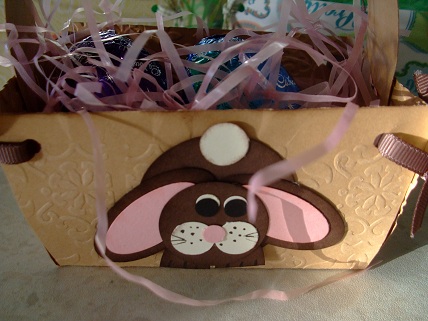
Unfortunately, I didn't take one of the card on it's own.  Here is the inside

The little tag says 'to open', just so it gives a hint to pull the arm!!
Anyway, here are some quick instructions,
51/2" x 81/2"  score in half  (41.4")   card base
4" x 51/4"    card (for front)   Need to cut 13/4" hole to put Sweet treat cup in or use your full heart punch.
                    Push punch all the way in, in the centre.  Easy when using the circle as I just put the 4 x 51/4
                    over the card and punched a 11/4" hole so I could put my lollies in.  With the heart, you will
                    have to mark it, so you can get it right!  Still use the 11/4" to punch hole though
21/2" x 33/4"  card for slider
The body is made with a 21/2" round punch if you have it, I used the circle scissor and punched out the middle with 13/4".  Would love the 21/2" punch though, anything for ease!!!  This piece gets put over the sweet treat cup as his body.
2 x sml oval pink!  (inside of ears)
2 x lge oval  (ears)
2 x full heart  (one for face and one for feet  -  cut the feet one in half and there you have it)
2 x modern label punch  (arms -  on one you need to cut a little off, it is the left hand and needs to fit under his tummy - with the curved bits, it doesn't work to well)
heart to heart in pumpkin pie or orange (for his carrot)  little heart x 3 for the leaves coming out of the carrot.
2 x 1/4" circle for eyes
2 x black pupils (used the owl punch for this)
So some quick instructions:
Put treat cup in 4 x 51/4 piece, place body over (you can have glue or tape on it but don't stick it down till you put feet and arm under him)
Place his feet under body, and put three little pink hearts or circles on for pads of his feet.
Place the cut label punch (left) under the body and bring up to sweet treat cup, using a glue dot to stick down.
Make your carrot by gluing three sml green hearts to the top of the orange heart, nip the green hearts to look leafy.  Stick to modern label which will be one of his arms and put aside.
Make his ears and attach to the back of the heart and then make his face and put on the card.
Draw his whiskers and using a white gel pen on his pupils.
Using dimensional on each corner of the matting, place on your card.
Slide in the slider, with arm attached and pull his arm over to the sweet treat cup (using dotto to stick, so that it can keep coming off).
Now for the inside of the card:
Scallop over the hole (with a hole cup out)
and a tag with instructions Got treats stamp set (my favourite, even though I have heaps of favourites I love this one)
If you would like me to do up a picture tutorial I will.  I will spend the next couple of days looking for the blog, so sorry about that.
Have a great day,  tomorrow I will show you Robyn's pressie, hopefully I will get to her today....
Thanks for stopping by....

Easter Pressie

Hi all,
  I received a swap from Kerry today, and OMG.  You are going to be so jealous!!  It is so beautiful, I love everything in it, super, super gorgeous.  I was going to show you the card I sent to Kerry today but I didn't take a picture so I will have to make another one to show you.  So now on to Kerry's box:
Is that an OMG or what???


  These single photo's are not as clear but I was trying to get a bit more up close and personal.
  When I was browsing my photos, I saw the card I sent to Kerry, so I will post that tomorrow with instructions..... punch card, I know, I know,  I am definitely a punch person!!
Have a lovely evening....

Thursday, April 14, 2011

Chocolate Bunny Box

Good morning,
  I have had this box for a while now and couldn't wait to show you.  We had a swap over at Crafters Anonymous and it was a box or bag and Chocolate (with a capital C) and a card to match.  Well I got Kerry Bunting and was a bit intimidated.  I love her work and was worried, have a look WHY  I love her work.  So I probably sabotaged myself before I started.  But I do love my bunny.
Isn't he just adorable!  I cased him from Tammy, dream, create and share, Tammy has such a lovely blog so you will have to check it out.  So here are all the pieces needed:

So the pieces are:
2    -  Top note die pieces
4    -  Wide oval punches
2    -  3/4" black circle  (I have yet to buy that one, so I use a couple of circles from the owl punch)
2    -   Large ovals - pink
2    -   Large ovals - brown
1    -   Heart shape  (heart to heart)
2    -   13/8" circles - brown
1    -   1" circle - brown
2    -   3/4" circles - pink
2    -   1/2" circles - pink
4    -   1/4" circles - pink
Box
81/2" x 41/4"   scored  (41/4")   1" from each side
                       scored  (81/2")   31/2" from each side
Make your box by cutting the centre flaps and adhering adhesive to put together.  Tape is placed on the picture above for the box, so just refer to the photo.

I have sponged all he edges and put them together so you can see what needs to be done.  Now just put all pieces onto the box and top note.  Tammy had put a ribbon on the box near his ear as well.   She has a great tutorial if you need more information
Tomorrow I have another Easter surprise for you.  It is another swap and I am not sure how I am going to get it to her!!!
Have a lovely day/night.....

Monday, April 11, 2011

And Another Purse

Morning,
  Yes another cute little purse cased yet again from Patti Lee.  I made this one in two sizes, even though I loved the small one, I wanted one a little bigger as well, so lets go.

So this is the two different sizes.  You can see the small one is pretty tiny.  I love these bags.  Once on Stamping connections (a Stampin'Up site, there was a gorgeous box that one of the girls had put up that folded down.  Don't worry I tried to get the instructions but alas.....)
Anyway, I'll give you some quick instructions but Patti has a more detailed tutorial on her site.
1 piece of dsp  4" x 4"    scored  15/8" and 2 3/8" turn and
                                      score  3/4" on both sides
2 pieces of card  21/2" x 1"  scored in half
2 round tab punches in card  for tabs to hold purse together
2 pieces 1/4" x 6" card for handles
  Fold the dsp on the score lines (like the purse from yesterday 10.4.11) and place tape on the four edges to keep the sides down.
  Take your two pieces of 21/2 x 1 card and make two little slits in the score line towards the edges for the handles (exactly the same as yesterday).  Place your thin strips of card (handles) through the slits and tape down and on the two sides ready to stick to dsp.  Once you have your card on both sides over the dsp add your round tab punches to both sides and add a velcro dot.  Decorate.  If you need me to do a tutorial for you just let me know.
Now the larger one is:
1 piece of desp 8" x 8"      scored at 33/8" and 4 6/8"  and turn
                                         score at 11/2" both ends
2 pieces 5" x 2"                 score 2" side in half
2 round tab punch
2 pieces 1/4" x 81/4" card for the handles.
So everything is a little larger and I love this size the best
Have a lovely day/night......

Surprise, Surprise

Hello,
  I am trying to do some study and it is going no where so I thought I would do a quick blog instead.  Much more fun.  I sent a parcel off today, for a Easter swap.  I tell you I have been so nervous about what this person will think of it.  At Crafters Anonymous we were paired off with a person to send a little gift to, had to be a box or bag and chocolate.  So here is my parcel going off today.  My fingers are crossed that she likes it.  After she gets it, I will show you what I sent and instructions for the ??
I even used a pre-loved Stampin' Up box.  I love the re-use, re-use!!  So you'll have to stay tuned to see what it is!
And tonight, I joined in on Crafters Anonymous on-line tutorial again, love Monday nights.  Have heaps of study to do but can't miss a class.  And tonight we learnt the cutest cupcake box/container.  I will have another go or two and see what I come up with.  But here is my creation from tonight:


It was so much fun.  The little ties you can see are actually meant to be there, it is embroidery thread tied to the lid, to the base.  A couple of the girls used ribbon which was really lovely as well.  The instructions can be purchased on the crafters site.
Thanks for stopping by and have a great night....

Sunday, April 10, 2011

Collapsible Bag

Hiiiiiiiiii,
  Do you like my title, I don't really know if that is a word but anyway, it fits, so it has to be!!.  So one of my little bags
I cased this one, again from Patti Lee.

Need
6" x 6" dsp      scored  21/2", 31/2" turn and
                       score 11/4" on two sides.  Earlier we talked about bending dsp to make another score line which is what I did in this photo

Add sticky to ends as shown.
picture of ends taped down.

Other pieces that are needed.
2 pieces of co-ordinating card    21/2" x 1" scored in half   and two slits cut at either ends so handle can go through.
11/4" x 31/2" card for flap
2 pieces 1/2" x 81/4" card for handles
2 pieces 2" x 31/2" card for top of purse     scored in half on the 2" side  and cut two slits on the ends (on the scored line) for the handles to fit through.


I was doing a lot of pictures as this part can be a little tricky for the first time.  So don't worry if you muck up because it will still work.


Add velcro to both sides of your flap.


Side view and another little purse front on.  They are so easy and so cute to make.  Any problems, just let me know.
Stamp set:  Garden whimsy
Card:  Dsp - greenhouse gala, chocolate chip and pumpkin pie, so saffron and old olive
Ink:  Chocolate chip
Acc:  Velcro
Thanks for popping by and have a lovely night....